Build a FullStack AI NFT Minting dApp - Part 1


You probably know about Web3 and AI. So, let's get into the game without wasting any time.
In this article/tutorial, we will be building a full-stack Ai NFT Minting dApp that generates images using user prompts and converts them into NFTs.
So, let's get started.
First things first, we will start with setting up our basic folder structure. Wherever in your computer, you want to save this project, create a directory called "ai-nft-minting-dapp". In that dir, create two directories 'client' and 'hardhat'.
Inside the hardhat dir. Run the following commands
npm init -y
npm install --save-dev hardhat
npm install --save-dev @nomicfoundation/hardhat-toolbox
npx hardhat .
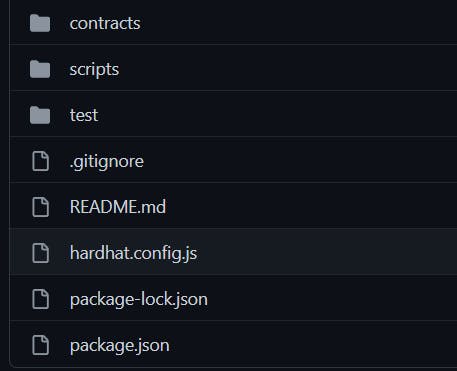
After all this, your hardhat directory should look something like this 👇
Congratulations 🎉! We have successfully set up the folder structure for our backend.
Now it's show time!
We will start with coding our Smart Contract in Solidity.
If you are wondering what a smart contract or solidity is, click on the hyperlinks to know more.
Oh! Sorry, I forgot about it. You also need to install @opezeppelin/contracts package which provides a standard for ERC-721 tokens. You can do that by running this command :
npm install @openzeppelin/contracts
Ok, so you are set up. Let's start coding.
Delete the Lock.sol file that is there by default in the contracts directory and create two new files called "AiMints.sol" and 'Whitelist.sol' .
Inside the Whitelist.sol directory paste the following code:
//SPDX-License-Identifier: UNLICENSED

pragma solidity ^0.8.0; // version of solidity compiler to be used. This specifically means any version above 0.8.0

contract Whitelist {
    // stores max number of whitelisted addresses allowed
    uint8 public maxWhitelistedAddresses;

    // numAddressesWhitelisted -> would be used to keep track of how many addresses have been whitelisted
    uint8 public numAddressesWhitelisted;

    //Create a mapping of whitelistedAddresses
    mapping(address => bool) public whitelistedAddresses;

    //Setting the Max number of whitelisted addresses
    // User will put the value at the time of deployment
    constructor(uint8 _maxWhitelistedAddresses) {
        maxWhitelistedAddresses = _maxWhitelistedAddresses;
    }

    /**
     * addAddressToWhitelist - This function adds the address of the sender to the whitelist
     */

    function addAddressToWhitelist() public {
        // check if the user has already been whitelisted
        require(!whitelistedAddresses[msg.sender], "Sender has already been whitelisted");
        // check if the numAddressesWhitelisted < maxWhitelistedAddresses
        require(numAddressesWhitelisted < maxWhitelistedAddresses, "More adresses can't be added, limit reached");
        // Add the address which called the function to the whitelistedAddress array
        whitelistedAddresses[msg.sender] = true;
        // Increase the number of whitelisted addresses
        numAddressesWhitelisted += 1;
    }

/* isWhitelisted takes an address as a parameter and returns if the address
is whitelisted or not. */
    function isWhitelisted(address _sender) public view returns(bool) {
        if(whitelistedAddresses[_sender]) {
            return true;
        } else {
            return false;
        }
    }

}
I have commented the code so you can understand what is going on in here.
Next, we need to write code for our main NFT smart contract.
Inside AiMints.sol, code the follwoing:
//SPDX-License-Identifier: UNLICENSED
pragma solidity ^0.8.4;  // specifies the version of solidity compiler to be used

// Here we are importing utility contracts from OpenZeppelin
import "@openzeppelin/contracts/utils/Counters.sol";
import "@openzeppelin/contracts/token/ERC721/extensions/ERC721URIStorage.sol";
import "@openzeppelin/contracts/access/Ownable.sol";
import "./Whitelist.sol"; // importing the whitelist contract
contract AiMints is ERC721URIStorage, Ownable {    // inheriting all the methods and variables from ERC721URIStorage and Ownable Contract.

    using Counters for Counters.Counter;
    //_tokenIds variable has the most recent minted tokenId
    Counters.Counter private _tokenIds;

    // nftsMinted stores the number of NFTs each user has minted.
    mapping(address => uint8) public nftsMinted;

    // whitelist is variable of type Whitelist which will help us to interact with the whitelist contract.
    Whitelist whitelist;

    // constructor is a function that is run automatically by the compiler when the contract is deployed. we initialize the whitelist variable as an instance of the previous whitelist contract. We also call the constructor of ERC721 contract that we inherited and pass the name and symbol for our NFT collection.
    constructor(address whitelistContract) ERC721("AI Mints", "AIM") {

        whitelist = Whitelist(whitelistContract);

    }

    /* _baseURI() is a function that returns the URI for the NFT data.
    After deploying our NFT collection OpenSea uses this function to fetch data for our contract by concatenating it with tokenId.
 */
    function _baseURI() internal view override returns (string memory) {
        return "< your website domain >/api/tokenURI/";
    }

    /* whitelistMint allows the whitelisted addresses to mint NFT for 0.01 ETH */
    function whitelistMint(string memory tokenURI) public payable  {
// checking if the user has already minted three NFTs.
        require(nftsMinted[msg.sender] < 3, "Max limit reached");

// checking if the user is whitelisted or not.
        require(whitelist.isWhitelisted(msg.sender), " You are not whitelisted");

// making sure that the user sends the correct amount of ether
        require(msg.value >= 0.01 ether, "Ether sent is not correct");

        _tokenIds.increment();
        uint8 no = nftsMinted[msg.sender];
        no += 1;
        nftsMinted[msg.sender] = no;

        uint newTokenId = _tokenIds.current();

        _safeMint(msg.sender, newTokenId);
        _setTokenURI(newTokenId, tokenURI);
    }

/* publicMint allows non-whitelisted addresses to mint NFT for 0.02ETH */
    function publicMint(string memory tokenURI) public payable {
// checking if the user has already minted three NFTs.
        require(nftsMinted[msg.sender] < 3, "Max limit reached");
// making sure that the user sends the correct amount of ether
        require(msg.value >= 0.02 ether, "Ether sent is not correct");
        _tokenIds.increment();
        uint8 no = nftsMinted[msg.sender];
        no += 1;
        nftsMinted[msg.sender] = no;

        uint newTokenId = _tokenIds.current();
        _safeMint(msg.sender, newTokenId);
        _setTokenURI(newTokenId, tokenURI);
    }


    // a function to allow the owner of the collection to withdraw Ether.

    function withdraw() public onlyOwner {
        address _owner = owner();
        uint256 amount = address(this).balance;
        (bool sent, ) = _owner.call{value : amount}('');
        require(sent, "Failed to sent Ether");
    }

// getNumberOfNFTsMinted returns the number of NFTs minted by the _sender address
    function getNumberOfNFTsMinted(address _sender) public view returns(uint8) {
        uint8 no = nftsMinted[_sender];
        return no;
    }

    // returns the latest minted tokenId
    function latestTokenId() public view returns(uint) {
        uint latestId = _tokenIds.current();
        return latestId;
    }

// Returnst the Data for contract
    function contractURI() public view returns (string memory) {
        return "<replace this with your url>";
    }


          // Function to receive Ether. msg.data must be empty
    receive() external payable {}

    // Fallback function is called when msg.data is not empty
    fallback() external payable {}

}
That is it. We have successfully completed coding our smart contract.
Let's write a script to deploy it.
Now, go into the scripts directory of the hardhat folder and remove all that there is in the deploy.js file and paste the following code :
const hre = require("hardhat");

async function main() {
  //Whitelist Contract Factory
  const whitelistContract = await ethers.getContractFactory("Whitelist");
  const deployedWhitelistContract = await whitelistContract.deploy(100);
  await deployedWhitelistContract.deployed();

  //Deploying the AiMintsCollection
  const aiMintsContract = await ethers.getContractFactory("AiMints");
  const deployedAiMintsContract = await aiMintsContract.deploy(deployedWhitelistContract.address);

  await deployedAiMintsContract.deployed()


  console.log(`
  Whitelist Contract Deployed to ${deployedWhitelistContract.address}
  AiMints Contract Deployed to ${deployedAiMintsContract.address}
  `)
}

// We recommend this pattern to be able to use async/await everywhere
// and properly handle errors.
main().then(() => {
  process.exit(0)
}).catch((error) => {
  console.error(error);
  process.exit(1);
});
We are all set to deploy our smart contract, we just need to configure something before that. Go into the hardhat.config.js file inside the hardhat directory, remove all that is there, and paste the following code:
require("@nomicfoundation/hardhat-toolbox");
require("dotenv").config();

const { REACT_APP_ALCHEMY_API_URL, PRIVATE_KEY } = process.env;


module.exports = {
  defaultNetwork: "hardhat",
  networks: {
    // hardhat: {
    //   chainId: 31337
    // },
    goerli: {
      url: `${REACT_APP_ALCHEMY_API_URL}`,
      accounts: [ `${PRIVATE_KEY}` ]
    }
  },
  solidity: {
    version: "0.8.4",
    settings: {
      optimizer: {
        enabled: true,
        runs: 200
      }
    }
  }
};
If this is your first time building a dApp, you might be wondering what is this
REACT_APP_ALCHEMY_API_URL & PRIVATE_KEY .
In the hardhat directory, create a .env file and paste the following
REACT_APP_ALCHEMY_API_URL="<replace this with your alchemy url>"
PRIVATE_KEY="Replace this with your wallet's private key"
You can get your alchemy url by creating an endpoint for your app here.
Phew! Finally it's done. We're ready to deploy our smart contract now.
Open a terminal in the hardhat directory and run the following command👇
npx hardhat run scripts/deploy.js --network goerli
You will get the address of your deployed smart contract. Copy that and keep it in the store, you will need that later.
That's it for the backend.
Now it's time to build our front end.
Head into the client directory that you created earlier, open a terminal there, and run the command npx create-next-app . . This will create a starter template for our Next.js application.
Apart from this, we are also going to need certain dependencies to connect our app to the smart contract. Head onto the terminal and run:
npm install ethers axios sharp
We are going to use ethers.js to interact with our smart contract, axios to send api requests and sharp to compress the images.
For keeping the article short, I am dividing the entire tutorial into two different articles. Checkout the rest of the stuff in part 2.